

How To Change High Beam On 2009 Ford Flex
Ford Flex Headlight Bulbs Replacement Guide
How to modify a burnt out depression / loftier beam, forepart turn signal or side marker light bulb in a 2009 to 2019 Ford Flex.
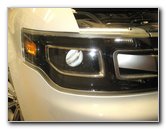
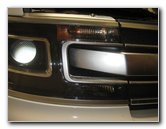
2019 Flex Headlight
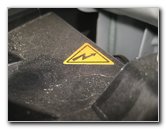
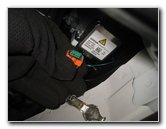
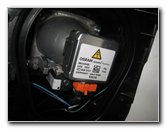
Xenon HID Warning Sticker
Disconnect 12V Battery
Owners of other Ford or Lincoln vehicle such every bit the Explorer, Fiesta, Focus, Fusion, C-Max, Mustang, Taurus, EcoSport, Escape, Border, Expedition, Transit Connect, F-150, Ranger, MKZ, MKC, Navigator, MKX and Continental may also find these DIY instructions to exist helpful.
If your Flex is equipped with Xenon HID (high intensity discharge) low / high beam headlight bulbs, the compatible replacement office number is D3S.
If your Flex has standard halogen low / loftier beam headlight bulbs, the replacement part number is H13.
The other uniform replacement light bulb part numbers are as follows: Forepart Plough Signals 3157NA (or 3457NA) and Front Side Marking 168. (Well-nigh model years are equipped with LED forepart side mark lights.)
The tools needed to admission and replace the Xeon HID headlight bulbs include a 5.5mm socket with a 1/four" drive ratchet and a Torx T10 star bit screwdriver.
No tools are needed to access and supersede the standard halogen headlight bulbs. Just pull off the rubber dust cap or twist off the plastic dust cover, rotate the onetime bulb 1/4 turn in the counterclockwise direction and disconnect the power plug.
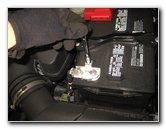
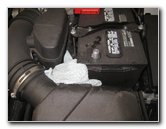
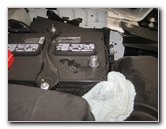
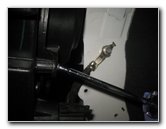
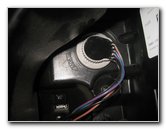
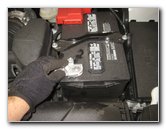
Pull Off Negative Terminal
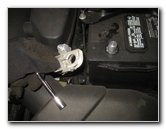
Embrace & Tuck Away
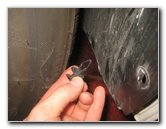
Cycle Well Popular Rivet
![]() The ballasts for Xenon HID bulbs operate at a very high voltage which can exist unsafe.
The ballasts for Xenon HID bulbs operate at a very high voltage which can exist unsafe. ![]()
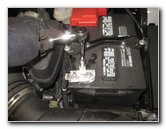
Disconnecting the negative final on the 12V battery and allowing some time to pass will ensure that the capacitor in the seedling anchor is no longer energized. The ballasts normally accept a bleed resistor to safely dissipate the stored electricity when the power is disconnected.
Disconnecting the battery is as well a good idea to preclude the possibility of someone accidentally turning on the headlights while you are replacing the bulbs.
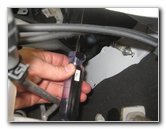
Remove the "-" negative terminal by turning the nut in the counterclockwise direction with a 10mm socket and a 1/four" drive ratchet.
Pull off the negative final from the "-" battery post, wrap information technology in a small-scale towel and tuck it abroad on the side of the battery to help prevent accidental electric contact.
If the sometime calorie-free bulb was recently turned on, let some time for it to cool off.
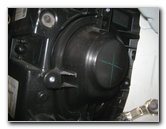
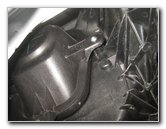
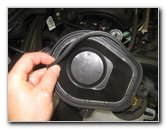
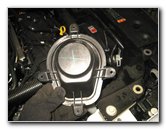
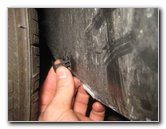
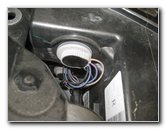
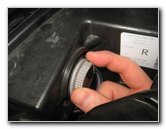
At that place is a plastic grit encompass on the dorsum side of the low / high beam headlight housing.
It is held in place past four modest Torx T10 screws.
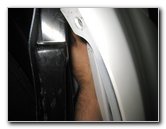
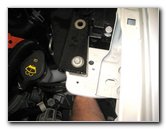
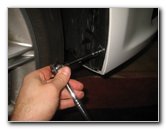
Three of the screws tin can be accessed from inside the engine bay. The fourth spiral can only be accessed past going in through the wheel well.
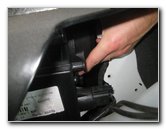
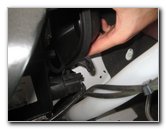
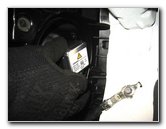
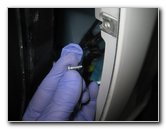
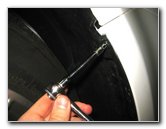
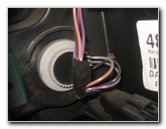
Locate the black plastic popular rivet and three black metallic screws on the bicycle well liner.
Pry out the middle of the popular rivet fastener with a flathead screwdriver to unlock information technology.
Then pry out the base of operations of the pop rivet. Set it aside in a safe identify.

Remove 3 Screws
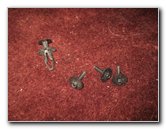
one Pop Rivet & 3 Screws
Plastic HID Seedling Cover
Set the three screws bated in a condom place.
4 Modest Torx Screws
Loosen Counterclockwise
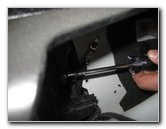
Access From Engine Bay
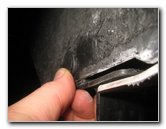
Carefully spin out the screws the last plough or two by mitt to prevent from loosing them.
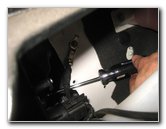
Remove 3rd Screw
Access In Wheel Well
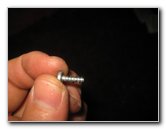
Remove 4th Screw
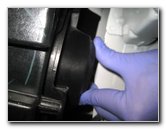
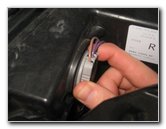
Pull back the bike well liner.
Remove the 4th Torx T10 screw by turning it in the counterclockwise direction.
4th Screw Removed

Four Torx Screws
Pull Off Dust Cap
Carefully pull the grit cap off the rear of the headlight associates.
HID Encompass Removed
Supercede Condom Gasket
Rear of Quondam Xenon HID
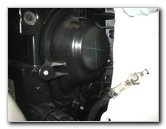
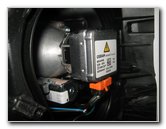
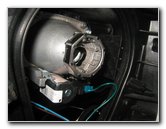
Once the cover is out of the fashion, you'll be able to run into the ballast on the rear of the old Xenon HID seedling.
I recommend wearing rubber gloves for the next few steps for extra safety.
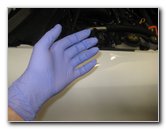
Nitrile Rubber Gloves
12V Battery Asunder

Orange Power Plug
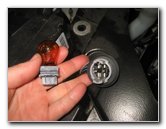
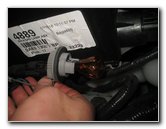
Locate the orange plastic electric connector on the bottom of the old bulb assembly.
Press Release Tab

Pull Off Electrical Connector
1/iv Turn Counterclockwise
Advisedly rotate the base of operations of the former light bulb 1/4 turn in the counterclockwise direction earlier pulling it straight out of the socket.
Old Low-cal Bulb Removed

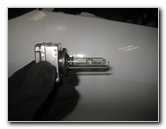
66340HBI D3S 35W
Empty Bulb Housing
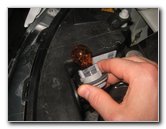
Avoid touching the glass part of the new Xenon HID seedling with your fingers or anything greasy in the engine bay.
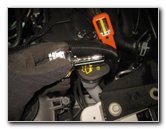
New HID Bulb
1/4 Plow Clockwise - Lock
Push On Power Plug
Install the new D3S seedling into the housing and rotate it 1/4 turn in the clockwise direction to secure it into place.
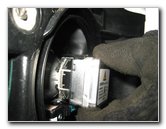
Button the electrical connector straight into the socket on the bottom of the anchor.
You lot should hear or feel the ability plug "click" securely into place.
Power Plug Secured
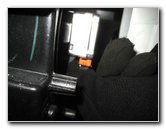
Plastic Dust Cover
Lower In Dust Cover
Push the dust cover dorsum into place on the rear of the headlight housing.
Dust Encompass In Identify
Replace Torx Screws
fourth Screw - Wheel Well
Replace the fourth screw from the bike well.

Replace Bicycle Well Liner
Re-Insert Pop Rivet
Pop In Heart Pivot
Re-insert the black plastic pop rivet and push in the center piece to secure it into identify.
Supplant Iii Screws
Tighten Clockwise
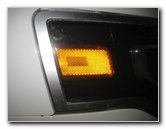
LED Side Marker Calorie-free
If y'all accept an early model yr Flex with a traditional incandescent front side marking light, the uniform replacement miniature wedge base low-cal seedling part number is 168.
It might be easiest to access the side marker seedling socket through the wheel well liner.
Two Turn Point Lights
Two Bulb Sockets
Turn Signal Bulb Socket
The two plow signal lights are located near the inner edge of the housing.
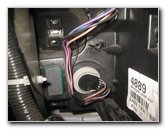
Locate the gray and blackness plastic seedling sockets from the superlative of the engine bay.
1/four Plow Counterclockwise
Remove Bulb Socket
Pull Out Onetime Lite Bulb
Gently pull the old turn signal light seedling direct out of the socket.
You may need to slightly wiggle the old bulb while pulling information technology out.

Push button In New Light Bulb
i/four Turn Clockwise - Lock
2nd Plough Signal Bulb
Push button a new number 3157NA or 3157A seedling straight into the socket.
(Sylvania specifies that their 3457A bulb is likewise compatible with the 2009 to 2019 Flex.)
Re-insert the seedling socket into the housing and rotate it 1/iv turn in the clockwise direction.
Repeat the steps for the 2d front plow signal light bulb if necessary.
2d Seedling Replaced
Replace Negative Terminal
Tighten Nut Clockwise
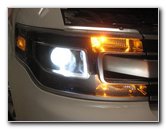
Test New Headlight Bulbs

Testing Loftier Axle Lite
Attempt to avoid over tightening the terminal nut to foreclose from groovy the battery mail which could lead to an acid leak.
To examination the new light bulbs, turn on the headlights, flash the high beams and activate the hazard signals.
Be sure to record the bulb modify in your SUV's service records.
If you asunder the 12 volt battery, delight remember to adjust the time on the clock and program your favorite radio stations before you begin driving.
Delight cheque out all of my Ford Flex DIY Repair & Maintenance Guides.

Source: https://paulstravelpictures.com/Ford-Flex-Headlight-Bulbs-Replacement-Guide/index.html
Posted by: medranosookinium.blogspot.com
0 Response to "How To Change High Beam On 2009 Ford Flex"
Post a Comment